
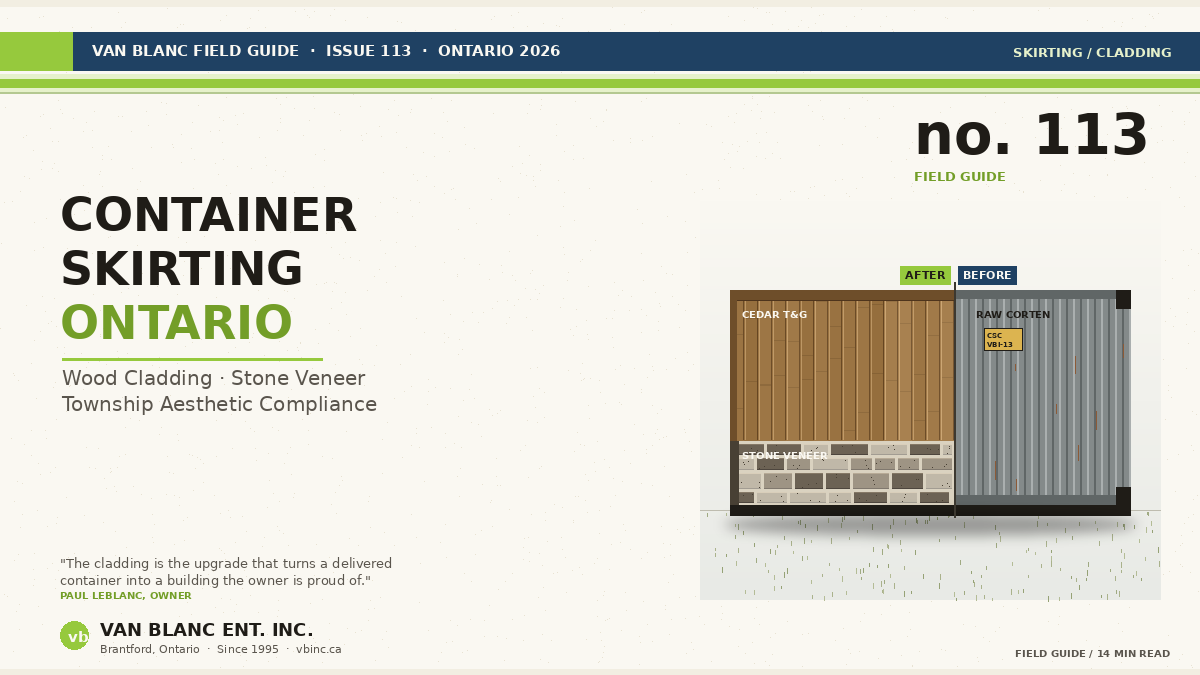
Quick Answer: Container skirting in Ontario (one branch of the on-site changes buyers order at the yard) wraps a shipping container in cedar, stone veneer, fibre cement, or composite panels so the corrugated steel stops reading as industrial. Cedar is the affordable default; stone veneer sits at the premium end. A clad 20 foot box finishes as a complete wrap plus base skirt. Pricing varies by grade, size, and freight zone, so call Christian or Paul for a same-day quote.
In This Guide
- What is container skirting in Ontario?
- Why do Ontario buyers clad containers?
- Is cedar the best container cladding?
- Will stone veneer hold on a container?
- Fibre cement, composite, or vinyl?
- How do you close the gap under the box?
- Why does cladding need a rainscreen?
- What drives container cladding cost?
- What does cladding actually change?
- New or used container for cladding?
- Paul on township aesthetic letters
- Common first-clad mistakes
- Frequently asked questions
- Reach Van Blanc in Brantford
Reading time: about 14 minutes.
What Is Container Skirting in Ontario?
Container skirting in Ontario is the finish work that hides a shipping container’s corrugated steel and closes the gap under the box. Cladding wraps the walls in cedar, stone veneer, fibre cement, or composite, and the base skirt seals the space between the floor and the ground, so the steel reads as a settled building rather than an industrial drop.
Most buyers who type “container skirting” into Google are mixing two questions. The first is how to close the gap under the box so daylight stops showing between the ground and the bottom of the container. The second is how to dress the steel walls so the box stops reading as industrial when seen from the road, the lake, or the neighbour’s deck. In Ontario, the second question matters more in practice, because that is the part township letters and HOA complaints usually focus on.
We use the word skirting here to mean both jobs together: the work that turns a raw Corten box into something a residential, cottage, or commercial property can carry without conversation. The vertical wrap is cladding. The horizontal close-out at grade is the base skirt. Done well, the two pieces read as a single finish detail and the steel disappears.
Ontario buyers come to this question after one of three triggers. A township sent a notice. A neighbour stopped speaking. A spouse said the box has to go or has to look like something else by spring. Each trigger has a different timeline and a different budget, and the cladding choice has to follow.
This guide covers what works on Ontario containers, what fails in our freeze-thaw climate, what actually moves the cost in 2026, and what we tell customers at our four Brantford yards when they bring their township letter in for a read-through.
Why Do Ontario Buyers Clad Their Containers?
There are five reasons buyers wrap a shipping container, and the priorities sort by region.
Christian LeBlanc, second-generation operator: “Most people who call us about cladding are reacting to something. A letter from the township, a neighbour who stopped waving, a partner who wants the box to look like a building. Once we walk them through cedar over a clean one-trip box, the panic drops out of the voice. They stop seeing a problem and start seeing an outbuilding they actually want.”
Aesthetic compliance comes first in cottage country, semi-rural townships with site-plan controls, and any urban lot where a neighbour can see the box. Some Ontario townships, particularly in Muskoka, the Kawarthas, and parts of Halton Hills, treat visible raw steel as an accessory-structure appearance issue and ask the owner to clad. Each township handles this differently and the rules change. Placement requirements vary by municipality, and a quick call to your local planning office before delivery is the easiest way to confirm what works for your property.
Insulation comes second when the cladding doubles as a backing for rigid foam or mineral wool. A furring-strip system gives you a natural cavity for two inches of polyiso, which raises the wall assembly to roughly R-13 before you even touch the inside. For owners who want to take the assembly further, our container insulation guide covers spray foam, rigid panels, and the R-value math in detail. Owners planning to heat or cool the box (a backyard studio, a winterized container workshop, a sealed retail kiosk) often spend on cladding because the insulation it allows is worth the line item. Cladding sits alongside insulation, electrical, and door cuts in the broader range of finish work our Brantford yard scopes before delivery once you know how the box will be used.
Noise reduction comes third for boxes near roads or neighbours. Cladding plus a small air gap drops the metallic resonance of rain on the roof and wind on the walls. You will still hear the box, just at a lower volume and a different pitch.
UV and rust protection comes fourth. The factory marine coating on a one-trip container is rated for years of ocean exposure, but Ontario sun and salt spray (winter road treatment) accelerate the paint chalking on south-facing walls. A wood or composite wrap takes the UV hit and the steel underneath stays original.
Resale value comes fifth, and it is the one most owners do not think about until they go to sell. A clad container resells locally as outbuilding-equivalent (sometimes higher) instead of as a steel commodity. The cladding investment usually pays back when the property changes hands. We see the same families come back to our yard for a second box after they have moved.
Is Cedar the Best Cladding for an Ontario Container?
Of every cladding material that lands on Ontario containers, Western Red Cedar is the one we see most. Eastern White Cedar from Quebec is a close second, especially east of Kingston. Both are appropriate for the climate, both age into a silver-grey patina that townships and cottage neighbours read as residential, and both can be ordered as tongue-and-groove (T&G) or shiplap board.
The installation pattern is consistent. A frame of pressure-treated 2×3 furring strips runs vertically on the corrugated container walls, fastened through the high points of the corrugation with self-tapping metal screws and sealed at the penetration with butyl tape. The furring strip spacing matches the cedar board length: 16 inches on centre for standard 1×6 cedar, 12 inches if the building inspector or the cladding manufacturer asks. The cedar boards are nailed to the furring strips with 2-inch stainless ring-shank nails through the tongue of T&G boards, or face-nailed for shiplap.
The critical detail is the air gap. The furring strip system creates a 3/4 inch cavity between the steel and the back of the cedar, which is what the trade calls a rainscreen. Moisture that gets behind the cedar drains down the cavity and exits at the bottom through perforated insect screening. Without that cavity, condensation builds up against the steel, mould grows, and the cedar starts to rot from behind within three to five winters. We have walked into yards where someone glued cedar directly to the steel and the entire wrap came apart in pieces the following spring.
Western Red Cedar carries a real material premium in Ontario in 2026, while Eastern White Cedar costs less depending on grade and clear or knotty selection. Installed (with the furring frame, fasteners, flashings, and labour), a complete cedar wrap on a 20ft is quoted per project by a competent finish carpenter, and a 40ft runs proportionally more because it carries nearly twice the wall area. Pre-stained or factory-finished cedar sits on the higher end. Rough sawn local cedar from a regional sawmill sits on the lower end.
One Ontario-specific note: cedar handles freeze-thaw well, but the south-facing wall takes the most UV. Owners who want the silver-grey patina to develop evenly should expect the south side to grey faster, and either accept the asymmetry or apply a UV-blocking exterior stain to slow it. We have customers in their fourth and fifth Ontario winter on cedar wraps installed in 2021 and 2022, and the boards are still tight and clean. The system works when the rainscreen is real.
Sourcing cedar in Ontario without flying it from BC
Western Red Cedar ships from British Columbia and the freight is a real line item. If your township will accept Eastern White Cedar, you are buying a Quebec product with a much shorter haul to Ontario. Sawmills in Renfrew County, Lanark, and the Eastern Townships of Quebec carry T&G and shiplap profiles in standard thicknesses. Ask your contractor to price both before assuming Western Red is the only option. The savings on a 40ft wrap can be substantial.
Will Stone Veneer Hold on a Container Wall?
Stone veneer cladding has become more common on Ontario containers in the last five years, driven by the cottage-country aesthetic where a stone wainscot or a full stone wrap reads as cottage rather than industrial. Two systems are available, and the choice matters.
The first is manufactured stone veneer (sometimes called cultured stone), made of dyed lightweight concrete poured into rubber moulds that replicate real stone faces. Brands you will see in Ontario include Cultured Stone, Eldorado Stone, Stone Selex, and a number of Canadian regional manufacturers. Manufactured veneer weighs 8 to 12 pounds per square foot, which a properly fastened lath system on a container can carry without engineering review.
The second is natural thin stone veneer, sliced from real quarried stone (typically Algonquin granite, Wiarton limestone, or imported flagstones) to a 1 to 1.5 inch thickness. Natural veneer weighs 13 to 18 pounds per square foot and may need an engineered fastening pattern on a container’s corrugated wall, particularly above 8 feet of vertical run. Most cladders use a wire-lath-and-scratch-coat system: galvanized self-furring lath is screwed to the corrugation high points (sealed penetrations), a portland-based scratch coat is troweled on, and the stone is bedded in a polymer-modified mortar.
Corner detailing is where stone veneer either reads as expensive or reads as a kit. Real masons mitre corner pieces or use L-shaped corner units from the manufacturer’s catalogue. The lazy version uses straight pieces that show a vertical mortar joint at every corner, which is the visual fingerprint of a low-budget application. If you are paying for stone, pay the modest premium for proper corner units.
Installed cost on a 20ft container with manufactured veneer sits at the high end of cladding options, and natural thin stone veneer pushes it higher still. A 40ft adds roughly 60 to 80 percent to those amounts. Stone veneer is the priciest cladding option we see in the field, and it is also the one buyers tend to be happiest with three years later. The material does not move, does not need staining, and does not lose its colour. The only maintenance is occasional pressure washing if algae grow on the shaded north wall.
What About Fibre Cement, Composite, and Vinyl?
Cedar and stone are the visible favourites, but three other systems land on Ontario containers regularly, and each has a legitimate use case.
Fibre cement (Hardie Plank, James Hardie, Allura) is the budget-friendly residential look. Same installation pattern as cedar (vertical furring strips, rainscreen cavity, face-nailed boards), but the material itself is mineral and cement, factory-finished in one of about twelve standard colours. It does not silver out and does not need re-staining. Installed on a 20ft container it lands in the budget-friendly range. Fibre cement is brittle until it is fastened, so corners and cut edges need careful handling. Most contractors prefer it for the long maintenance horizon (25 to 40 years before refinishing).
Composite wood (Trex, MoistureShield, TimberTech, MAZE composites) is the deck-board industry’s adaptation to vertical siding. Boards are made of recycled HDPE and wood flour, factory-coloured, and rated for outdoor exposure without painting. The advantage over real cedar is zero maintenance for 25-plus years. The disadvantage is that the boards read as plastic up close, which some township aesthetic committees object to. Installed cost is mid-range, between cedar and stone.
Vinyl siding is the cheapest cladding by a wide margin when installed on a 20ft. The visual penalty is real (vinyl reads as suburban tract housing to most cottage buyers and most township aesthetic committees), and the freeze-thaw performance on a corrugated steel substrate can be variable. We have seen vinyl wraps on Ontario containers crack at the joints after the third or fourth winter when the substrate’s thermal expansion exceeds the panel’s tolerance. If budget is the deciding factor, vinyl works. If aesthetic compliance is the deciding factor, step up to cedar or fibre cement instead.
How Do You Close the Gap Under the Box?
A shipping container delivered on a tilt-deck truck lands on the ground with its corner castings either resting on the soil, on pre-poured concrete pads, or on engineered piers (sonotubes, helical screws, or concrete blocks). The bottom of the container floor sits roughly 6 to 8 inches above grade. That gap is where wildlife, leaf litter, and snow drift accumulate, and it is also where the cladded box reads as floating rather than settled.
Base skirting closes that gap with a horizontal panel detail that matches the vertical cladding. Three approaches cover most Ontario builds.
The simplest is pressure-treated 2x lumber framing covered with the same cedar, fibre cement, or stone veneer as the walls. The framing runs from grade to the bottom of the container’s bottom rail, fastened to the container with bolts through the bottom rail and to ground stakes or concrete blocks at the base. Vent gaps cut into the panel keep air moving under the box, which prevents moisture damage to the container floor from below.
The second approach is a poured concrete or block stem-wall foundation under the container, which doubles as the skirting. This is the more permanent solution and is the one township letters often prefer because it makes the container read as a foundation-mounted structure rather than a temporary placement. It costs more than a clad-frame skirt (and more again on a 40ft, since it includes excavation, footings, and a stem wall) but the finished look is closer to a conventional building.
The third approach is decorative-only: a fascia panel of cedar lattice, decorative metal screen, or stone-veneered cement board that hides the gap visually without closing it structurally. This is the fastest and cheapest version and it reads well from a distance, but raccoons and groundhogs treat the gap as a den and the township may not consider it sufficient.
The match-the-cladding approach is what we see most often on Ontario containers where the owner is going to live with the result for ten years or more. The detail looks intentional and the gap under the box is closed against pests.
Why Does a Clad Container Need a Rainscreen?
If there is one technical detail that determines whether a clad container lasts five years or twenty, it is the rainscreen cavity behind the cladding. The single most common failure mode we see on Ontario containers comes from owners who skipped this detail because a YouTube video made it look optional.
Here is what happens when cladding is fastened directly against the steel without an air gap. Warm interior air condenses against the cold steel on the inside of the wall. Outside air pushes humidity into the cladding from rain, snowmelt, and seasonal weather. The cladding absorbs moisture from both directions. There is no cavity for the moisture to escape because the cladding and the steel are sandwiched together. The wood (or the back of the fibre cement, or the lath behind the stone) stays wet for weeks at a time. Mould colonizes the back of the cladding. Steel rusts where it touches the wet material. Within three to five years the wall assembly is failing from inside the sandwich, where no one can see it until the cladding starts coming off.
A proper rainscreen reverses this. Pressure-treated furring strips run vertically every 16 inches on centre. The cladding is fastened to the furring strips, not to the steel. The 3/4 inch cavity behind the cladding lets moisture drain down and lets air circulate to dry whatever wet weather pushes in. The bottom of the cavity is screened against insects and the top is closed off against rain entry.
The cost of the rainscreen is real (the extra furring, fasteners, and screening scale with wall area, so a 40ft carries more than a 20ft) and the time is real (a day of additional carpentry). The cost of skipping it is the complete cladding replacement four years later, which is roughly ten times the original install. Every contractor we recommend uses a furring strip system. Ask any quoting contractor explicitly: “is this a rainscreen install?” If the answer is anything other than yes with a description of the cavity detail, find another contractor.
Steel substrate, fastener selection, and galvanic compatibility
Container walls are Corten weathering steel, an alloy that develops a protective surface patina but reacts badly to certain other metals when wet. Stainless steel screws and nails are fine. Aluminum fasteners corrode the steel through a galvanic reaction and should not be used. Hot-dip galvanized fasteners are the budget alternative to stainless and work well on container substrates. Self-tapping metal screws with neoprene washers seal the corrugation penetration where the furring strip attaches. Plan on roughly 60 fasteners per 20ft container wall, 100 per 40ft. The screws are not where you save money on the build.
What Drives the Cost of Cladding a Container?
The cost of cladding a container varies more than most online guides admit. Cedar grade, contractor labour rates, region of Ontario, and the choice of base-skirt approach all swing the number. This is what we see in 2026 Ontario quotes on a standard 20ft container wrap with a matching base skirt.
| Cladding material | Relative installed cost | Maintenance horizon |
|---|---|---|
| Eastern White Cedar T&G | Moderate | Re-stain every 5-7 years |
| Western Red Cedar T&G | Moderate to high | Re-stain every 5-7 years |
| Fibre cement (Hardie) | Budget-friendly | 25-40 years, repaint optional |
| Composite (Trex et al.) | Mid-range | 25-plus years, low maintenance |
| Manufactured stone veneer | High | 40-plus years, pressure wash only |
| Natural thin stone veneer | Highest | 50-plus years, pressure wash only |
| Vinyl siding | Lowest | 15-20 years, may crack in cold |
The ranking above assumes a 720 square foot wall area on a 20ft (4 walls plus ends, minus door area) and a 1,360 square foot wall area on a 40ft. Quotes include the rainscreen furring frame, fasteners, flashings, J-channels, and corner trim. They do not include the base skirt, which adds to the total depending on approach. They also do not include painting, staining, sealing, or any electrical penetrations that the cladding has to accommodate.
Most Ontario homeowners settling on a 20ft container as a backyard studio or workshop end up with a finished cladding job, base skirt included, that we quote per project. A 40ft costs proportionally more. Add the cost of the container itself (a one-trip 20ft or 40ft, quoted to your order) and the total project compares well with a quality custom-built backyard structure of the same footprint, with the added advantage that the steel underneath will outlast the cladding by three or four cycles.
What Does Cladding Actually Change?
Cladding a shipping container changes more than its looks. Owners often ask what the visible difference is when a container goes from raw steel to clad. The answer is more than aesthetic. A raw container reads to most observers as temporary. A clad container reads as permanent. That single perceptual shift is what drives most township aesthetic conversations toward resolution and most neighbour conversations away from confrontation.
Concretely, a clad 20ft container with cedar T&G walls, a cedar base skirt, a metal roof cap (or a cottage-style asphalt overlay), and two cedar door surrounds reads as a 160 square foot cottage shed. A clad 40ft with the same details reads as a 320 square foot guest cabin or workshop. The transformation is one of the reasons clad containers have become popular as the base shell for a backyard Airbnb or cottage vacation rental. The container outline is still there if you walk around the back and look, but from the road or the lake the assembly is a wooden building. Realtors who list properties with clad containers consistently describe them as “outbuildings” or “workshops” in MLS listings, not as containers.
Owners also report that maintenance work on the steel itself becomes easier after cladding. The walls under the cedar do not need annual rust touch-up because they are not exposed to UV or salt spray. The interior climate inside the box stabilizes when the cladding is paired with insulation. The visible value of the property changes in ways that the cladding investment usually justifies on its own.
Should You Clad a New or a Used Container?
This is the part of the cladding conversation we have with customers in the yard most often. If you are going to invest in dressing the outside of a container, the steel underneath should be in the condition that justifies the work. One-trip containers have factory-original marine paint, square doors that close cleanly, and no panel dents that telegraph through the cladding finish. Used containers (Cargo Worthy or Wind & Watertight) have varying degrees of cosmetic wear, surface rust, and door alignment issues that the cladding will either mask or expose.
On a one-trip box, the furring strips fasten through clean steel and the cladding sits true. On a heavily dented used box, the furring strips need shimming to get the cladding plane back to flat, which adds labour. On a box with door corner damage, the cladding has to work around the imperfect door alignment, which usually means more trim and more reveals.
We carry all three grades at our Brantford yards, and you can see what is currently on the lot ready to go out before you commit. We are not going to talk you out of a Wind & Watertight unit if your budget is the deciding factor, and we are not going to talk you into a one-trip unit if storage is the only use. But if cladding is in the plan, we usually recommend stepping up to one-trip. The premium on the steel over a comparable CW unit on a 20ft is small relative to the cladding investment, and the finished result will look better and last longer. Most cladding contractors we know agree.
For deeper detail on what the underlying box itself runs, our guide to what moves a container price breaks down the drivers. For the question of when stepping up to factory-fresh steel pays back versus a used unit, the page where we lay out our newest stock walks through the grade comparison.
Paul LeBlanc, owner: “Every spring we get the same call. Township sent a letter, the homeowner has 60 days to clad or move the box. Two things matter at that point. One, don’t panic. Township staff want a plan, not a hostile dispute. Two, start with the right steel. I have walked customers through cedar wraps over one-trip boxes that look like a real cottage outbuilding three months later. The owner ends up loving the building more than they thought they would. That is how 30 years of conversations like this usually end.”
What Does Paul Tell Buyers About Township Letters?
Paul has seen the same letter pattern arrive at our yard for three decades. The phrasing changes, the tone changes, and the township staff names change. The underlying question stays the same: the township wants the visible steel to read as residential. The owner has options. The conversation goes the way the owner approaches it.
“What I tell people is that the township is not your enemy on this,” Paul says. “The planning officer wants the file to close. The owner wants the building to stay. The cladding is the answer that closes the file and keeps the building. We are in the middle of that conversation more often than any single customer realizes, because we see the pattern across thousands of bins delivered into Ontario since 1995. The cladding is the upgrade that turns a delivered container into a building the owner is proud of.”
That perspective shapes how we recommend grade and how we recommend the cladding contractor. We do not do the cladding work ourselves (we are a container supplier, not a finish carpentry shop), but we keep a short list of Brantford-area finish carpenters and Muskoka-area cottage builders who do the work well. When a customer arrives with a township letter, we usually have a name to share before they leave the yard.
What Are the Most Common Cladding Mistakes?
Five mistakes recur across cladding jobs we see in the yard. Each one is fixable if caught before the work starts, expensive if caught after.
Mistake one: skipping the rainscreen. Covered above. The single largest source of cladding failure on Ontario containers. Insist on the cavity detail or do not start the work.
Mistake two: using aluminum or untreated steel fasteners. Aluminum corrodes the Corten steel through galvanic reaction. Untreated steel rusts at every penetration. Stainless or hot-dip galvanized only.
Mistake three: cladding the roof without addressing drainage. Cladding the four walls but leaving the original container roof exposed is fine if the roof slope is engineered to drain away. Most container roofs have a slight crown but minimal slope. Owners who clad the walls and then put a flat overlay on the roof create a moisture trap on top. The right detail is either a metal roof cap with proper slope, an asphalt overlay with adequate fall, or leaving the original roof exposed and accepting that the visible steel from above is acceptable (from drones, cottage hillsides, or upper-floor neighbours).
Mistake four: ignoring the door operation. Container doors are heavy. They swing on hinges that pivot 270 degrees. Cladding installed too close to the hinge line locks the doors in the closed position. Build the cladding around the door operation, not around the closed-door look. We see jobs every season where the doors will not open after the cladding finishes because the contractor forgot the swing.
Mistake five: assuming the township will accept “decorative” skirting. A trellis of climbing vines, a row of cedar shrubs, or a painted mural sometimes counts as aesthetic compliance and sometimes does not. Read the township letter literally. If it asks for “cladding in conventional building materials,” vegetation does not satisfy the request. Cedar, fibre cement, stone, or stucco does.
Frequently asked questions
How much does it cost to clad a 20ft shipping container in Ontario?
A complete cedar cladding wrap on a 20ft container is quoted per project, including the rainscreen furring system and base skirt. Fibre cement is similar. Stone veneer is higher, depending on whether you use manufactured or natural thin stone. Call us for a same-day quote.
Do I need to clad my container in Ontario?
Whether cladding is required depends entirely on your township and your specific property. Placement requirements vary by municipality, and a quick call to your local planning office before delivery is the easiest way to confirm what works for your property. Some cottage townships and residential subdivisions require it. Many rural and agricultural properties do not.
What is the cheapest way to clad a shipping container?
Vinyl siding is the lowest installed cost for a 20ft container. Eastern White Cedar shiplap or Fibre Cement plank are the next step up. The cheapest option that also satisfies most township aesthetic letters is fibre cement, because vinyl is sometimes rejected as visually non-conforming.
Can I install cedar siding directly on a shipping container?
No. Cedar fastened directly against the corrugated steel traps moisture against the wood and against the steel, causing mould and rust within three to five winters. A rainscreen cavity created by vertical furring strips at 16 inches on centre is required. The 3/4 inch air gap is what makes the cladding system last.
How long does cedar cladding last on a container in Ontario?
A properly installed cedar wrap with a rainscreen cavity, stainless or galvanized fasteners, and a re-stain every 5 to 7 years lasts 25 to 35 years in Ontario climate before significant board replacement is needed. Cedar without the rainscreen cavity often fails within 5 years.
What is the difference between cladding and skirting on a container?
Cladding refers to the vertical wrap on the container walls (cedar, stone, fibre cement). Skirting refers specifically to closing the gap between the bottom of the container and the ground. Most Ontario container projects include both, and the two finishes are usually matched in material so the assembly reads as a single building.
Does cladding add insulation value to a container?
The cladding itself adds only a marginal R-value (R-1 to R-3 depending on material). The rainscreen cavity behind it can be filled with rigid foam (2 inches of polyiso adds roughly R-12) which substantially raises the wall assembly performance. Most owners insulate the cavity at the same time they clad.
Can I clad a Wind & Watertight used container or do I need a one-trip?
You can clad either grade. A one-trip box gives a flatter substrate, no dent telegraphing through the cladding, and a longer life of the underlying steel. A Wind & Watertight unit is fine if the cladding contractor shims the furring strips to flatten the wall plane. The cost difference on the steel is small relative to the cladding investment.
Will stone veneer be too heavy for a shipping container?
Manufactured stone veneer at 8 to 12 pounds per square foot is well within the container wall’s structural capacity with a proper lath system. Natural thin stone at 13 to 18 pounds per square foot may need an engineered fastening pattern for walls over 8 feet of vertical run. A 9’6″ high cube container with full natural stone wrap should be reviewed by a structural engineer.
How do I match cedar cladding colour as the wood ages?
Cedar silvers at different rates depending on UV exposure. South-facing walls grey first, north walls stay browner longer. To slow silvering, apply a UV-blocking exterior stain (Sansin, Sikkens, or Cabot brands) every 5 to 7 years. To accelerate even silvering, leave all walls unfinished and accept the 3-year transition period.
Can a clad container still be moved?
Yes, but with care. The cladding adds weight (roughly 1,500 to 4,000 lbs depending on material) and adds to the overall height and width, which may push a 40ft into oversize permit territory for road haulage. If you plan to move the box again, talk to the cladding contractor about removable corner trim so the cladding can come off the corners cleanly.
What about painting the container instead of cladding?
Paint is a legitimate alternative for buyers who like the industrial look. A two-coat marine epoxy or direct-to-metal automotive paint system on a 20ft is a budget finish that lasts 8 to 12 years before recoating. Paint does not satisfy most township aesthetic letters because the corrugation profile is still visible. If a coat of paint might be enough for your situation, our walk-through of finishing the steel without full cladding covers that route.
Sources
- Western Red Cedar Lumber Association. (2024). Installing Western Red Cedar Tongue and Groove Siding. realcedar.com/siding/installation/profiles/tongue-groove
- Government of Ontario. (2024). Building Code (O. Reg. 332/12), Section 9.27 (Cladding). ontario.ca/laws/regulation/120332
- Canadian Standards Association. (2021). CSA O80 Series-21: Wood Preservation. csagroup.org
- Canadian Wood Council. (2024). Rain Screen Wall Systems: Best Practices for Canadian Climates. cwc.ca
Reach Van Blanc in Brantford
We have been supplying shipping containers across Ontario since 1995. Our warehouse is at 90 Morton Avenue E in Brantford, and we deliver right across the province on a cash-on-delivery basis. No surprise fees, no chase-the-paperwork. If you are planning a clad container build, come walk our yard. We carry one-trip 20ft and 40ft stock in the grade that takes cladding cleanly, and we can talk you through which steel suits your project before you pay anything.
Van Blanc Ent. Inc. 90 Morton Ave E Unit 1B, Brantford, ON N3R 7J7 +1 888-509-6658
Bring your township letter, your contractor’s quote, or just your plan sketch. Paul or Christian will walk the yard with you and help you pick the right base box for the wrap you have in mind. Fast 1-3 day delivery to every region across Ontario from our 4 Brantford yards. Worth the drive for unbeatable quality and family customer service with 30 years of experience.
Placement requirements vary by municipality. A quick call to your local planning office before delivery is the easiest way to confirm what works for your property.
Related Reading
Ready to price your container?
Tell us the size and your postal code and we’ll send back an all-in number, container, delivery, and placement, usually within 1-3 days. No pressure, no mystery fees.
Family-run in Brantford since 1995 · 200+ containers in stock · 4.9★ across 140+ Google reviews · every box graded by a person, walk it before it lands.